.png)
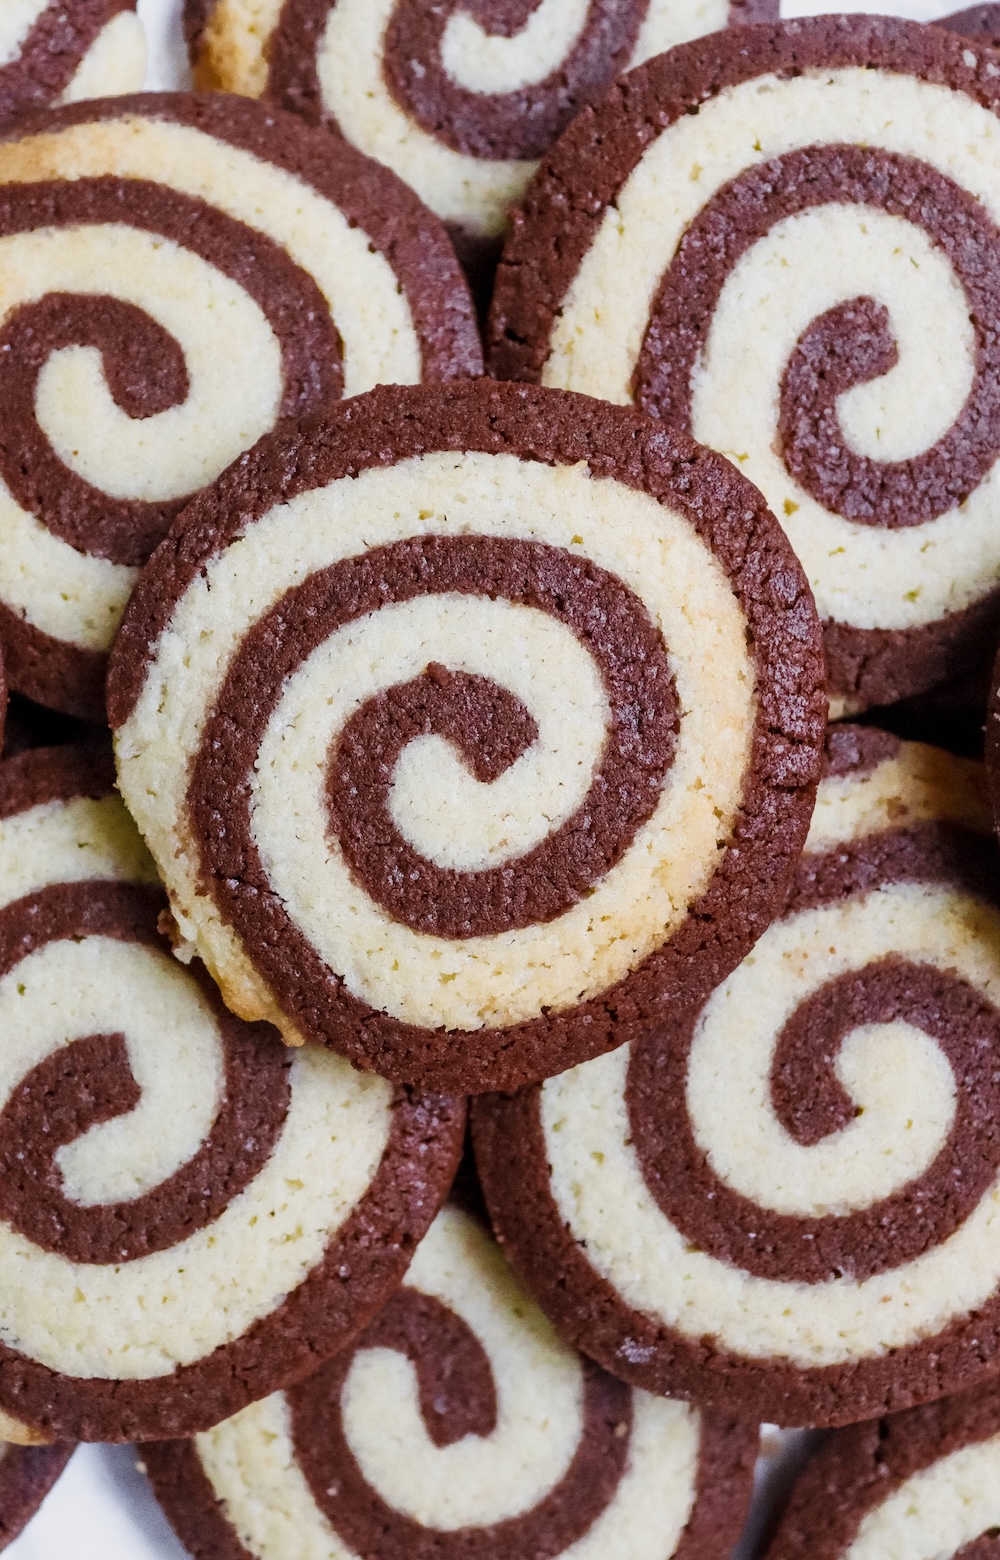
These Chocolate Vanilla Pinwheel Cookies look impressive, but the are surprisingly approachable once you’ve done it step-by-step. The dough is simple: one vanilla base that gets divided, with cocoa added to the other half to create two soft, workable layers. Once rolled out and stacked, the dough chills quickly, rolls cleanly into a tight spiral, and slices into neat pinwheels that bake up buttery with crisp edges and soft centres.
The flavour is classic cookie-shop vanilla paired with subtle cocoa. Nothing overly sweet, nothing too rich, just a balanced, simple cookie with a fun visual twist. These keep their shape beautifully, store well, and honestly just look great in your christmas cookie box
They also hold up in the freezer, both before and after baking, which makes them a great “prep ahead” option for the holidays or busy weeks.
Rolling the Dough Evenly
Aim for a thickness of 4 mm — thin enough to roll cleanly, thick enough not to crack. Using parchment on both sides makes the dough easy to move without sticking or tearing.
Freezing vs. Chilling
A quick freeze is essential. Soft dough won’t stack neatly or roll into a tight spiral. Freezing each layer ensures sharp edges and a clean roll.
Preventing Flat Spots
If you’ve ever made a slice-and-bake cookie log that flattened on one side, placing the chilled log inside a cut paper-towel tube or PVC pipe really helps it stay round.
Flavour Variations
You can flavour the vanilla dough with almond, swap the cocoa for matcha, or add espresso powder for mocha swirls. The technique stays the same.
Slicing Clean Spirals
A sharp chef’s knife works best. If the dough cracks slightly as you slice, just press the edges back together.
Cream the butter and sugar
In a stand mixer fitted with the paddle attachment, beat the butter, sugar, and vanilla on medium-high until light and fluffy. Scrape the bowl as needed.
Add the egg
Mix in the egg until fully combined.
Add dry ingredients
Add the flour, salt, and baking powder. Mix until a dough forms.
Divide the dough
Remove half of the dough and set aside — this is your vanilla dough.
Leave the remaining dough in the mixer.
Make the chocolate dough
Add the sifted cocoa powder to the dough in the mixer and mix until fully incorporated.
Roll both doughs into thin sheets
Working with one color at a time:
Freeze the sheets
Freeze the trays for 20 minutes, or until completely firm.
Trim to exact size
Remove from the freezer. Peel off the top parchment.
Use an A4 sheet of paper as a stencil and trim both doughs to the exact same rectangle.
If the dough softens, freeze again briefly.
Layer the doughs
Place the vanilla layer (on parchment) on the counter.
Loosen the chocolate layer from its bottom parchment, then carefully place it on top, leaving 1 cm of vanilla dough exposed on one long edge. Press lightly to eliminate air pockets.
Roll into a log
Let the dough stand for 5–10 minutes until just pliable.
Starting on the long edge, fold the exposed vanilla dough over the chocolate edge to start the roll. Use the parchment to help guide the dough into a tight spiral.
If cracks appear, gently patch them.
Once rolled, lightly roll the log back and forth to even out the shape.
Wrap and chill
Wrap the log tightly in plastic wrap.
Chill for at least 2 hours (up to 5 days).
For a perfectly round log, rest it inside a paper-towel tube or PVC pipe.
Slice the cookies
Preheat oven to 170°C. Line 1–2 baking trays with parchment.
Slice the log into 1 cm slices. Arrange on the tray, leaving a bit of space between each.
Freeze the sliced cookies for 10 minutes.
Bake
Bake for 15–16 minutes, or until the edges are set and just beginning to turn golden.
Cool on the tray for 10 minutes, then transfer to a wire rack to cool completely.
Store
Keep cookies in an airtight container for up to a week.
Nothing overly sweet, nothing too rich, just a balanced, simple cookie with a fun visual twist.
I’m so happy you’re here! Have a look around at some of my favourite recipes and stay a while.
Get a fresh delivery of only the goods delivered to your inbox.
KVK: 85225274
BTW: NL004070808B89
Leave a comment